 |
| A sneak peek of the project. Can't give away any more details, as it is a surprise gift! |
Tuesday, July 22, 2014
Done!!
Not much to write about tonight, other than that I finally finished a giant knitting project I've been working on! I started it over a month ago, so I'm very happy to be done! And now I can start my Rhinebeck projects!!

Saturday, July 19, 2014
Fruits (& Veggies) of My Labor!!
It is so nice to get produce from my garden finally! It still isn't in full production, but it is close!
I've already harvested all of the main heads off the broccoli, but the side shoots are coming along nicely.

Potatoes are almost done flowering, no idea when they'll get harvested though.

Two different batches of onions. I've already picked 1-2 onions, but the rest are still a bit small. The tiny ones on the left have quite awhile to go.

Cucumbers! There are 2 this size, and tons of tiny ones. Hopefully I've gotten rid of most of the beetles...

The spinach that my husband requested. It isn't doing great in the hot weather, but hopefully it will get big enough to pick.

The biggest 2 of the baby pumpkins.

The third batch of radishes that I planted. I picked a couple today, but most still need another week or so.

The cucumber plants look good too!

The squash plants are huge! I think I planted them too close together. I've harvested 4 of these already.

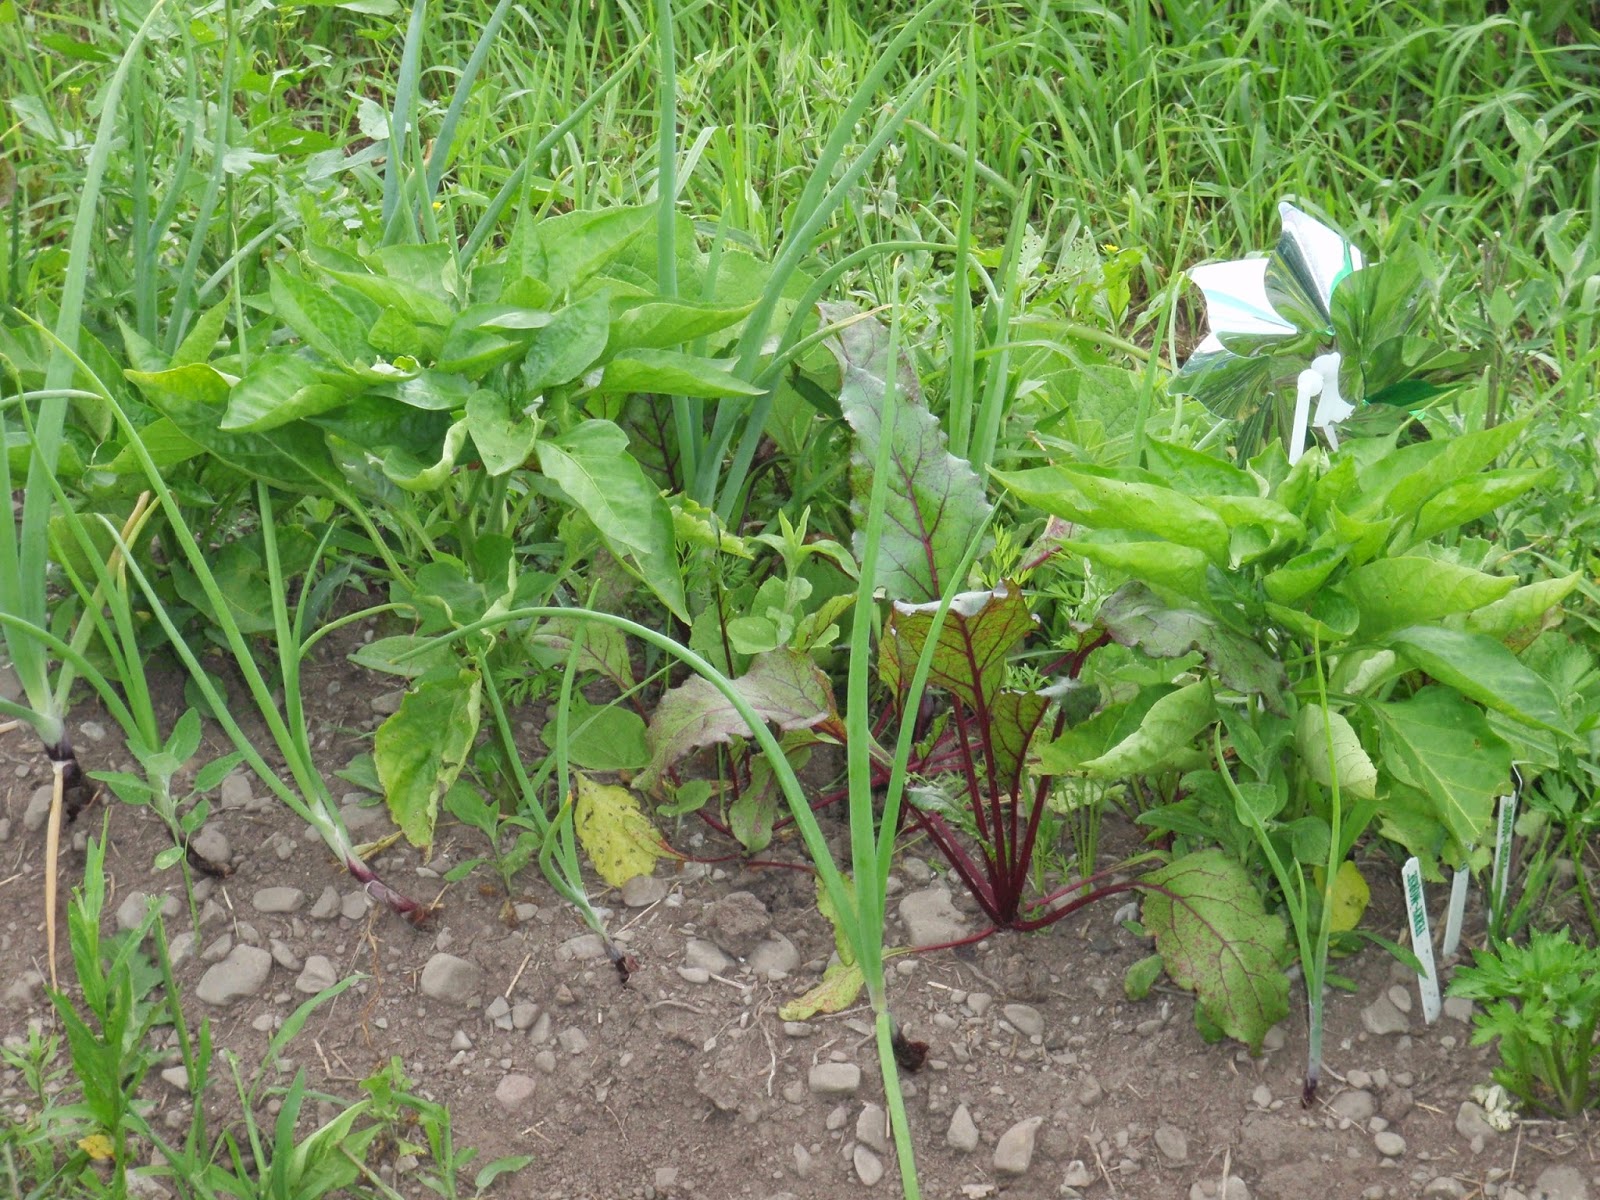
My favorite little patch of the garden, even if it isn't the most productive. This had radishes (they're all picked now), and still have beets, carrots, onions, and peppers. The pepper plants look good, but they still haven't flowered.
I have TONS of baby tomatoes!

Only 1 ripe one though!

The cherry tomato plant that is taller than me!

And of course, a grazing llama picture!

Thursday, July 17, 2014
Putting in Fence!
Well I guess it's the week for updates!
We've had a lot of rain recently, so the fence progress has been slow, but we're getting there!
I posted a few weeks ago about pounding the metal t-posts for the aisle from the shed to the pasture.
 |
| The aisle in the distance. |
After that was done we started putting in the corner post brace assemblies. Due to the aisle, our pasture has 4 true corners (3 posts with 2 braces each) and 2 half-braces (2 posts and 1 brace each). All of these posts must be set in cement.
 |
| Supplies for setting corner posts. |
I first marked where I wanted the corners to be (and measured each side so we wouldn't run out of fence!)
 |
| Flag where the corner post will be set. |
 |
| What a beautiful pasture! |
Then we started digging the holes with the auger on the PTO of the tractor. Of course we had the same luck as last year...breaking a shear bolt on the first post! Actually we broke 3 shear bolts in the first 4 posts, but (knock on wood!) haven't broken any since then!
 |
| First broken shear bolt! |
 |
| Pulling the auger out of the hole after the shear bolt broke. |
When we set the posts in concrete, we pour 40lbs of dry mix into the hole, followed by about 2-3 gallons of water. Then it gets mixed with a t-post and allowed to settle. The rest of the hole is filled in with dirt (and rocks).
 |
| Concrete and water in the hole. |
 |
| First finished corner post! |
We set the final corner post yesterday, and started on the wood line posts today. Every 4th post will be wood, the rest are metal t-posts. We have 5 of the 9 wood posts set, and hope the do the rest Saturday. In the meantime I'll be busy pounding t-posts!
 |
| Drilling for the third line post (the one in the background is loose, not set!). |
 |
| Drilling for the fourth line post. |
Tuesday, July 15, 2014
Recent Fiber Projects
I've been busy today (driving 5 hours to get organic chicken feed!), and really couldn't think of anything to write about for this post.
Luckily I had taken some pictures of my recent fiber projects, so I'll give a quick update.
First up is some 50:50 yak/silk from Abstract Fibers. It is the "Rockstar" colorway.
To be honest, I don't like spinning yak. I love the Abstract Fibers merino/yak blend, but I think that is only 20% yak or so. 50% is way too much for me! But a Ravelry group I follow (A Spinner's Study) had yak as one of their "fibers of the month" for July, so I decided to spin up the one braid I had stashed away.

I started out spinning the braid however it wanted to be spun. I don't spin fingering/lace weight very well, so I was shooting for a 2-ply sport weight or so.
After I finished the first half (1 bobbin- 2 oz), I decided to keep the yarn as a single, so that it would be lace weight. I'm going to leave the single on the bobbin for a few weeks to get rid of most of the excess twist, and then wind it onto the niddy-noddy and set the twist with hot water and some weight. Hopefully I can find a worthy lace project to use it with!

My recent knitting project is a bit of a secret, so I'll just share this little snippet. It is being knit with a gorgeous 50:50 wool/alpaca blend. I'll share more pictures later.

Saturday, July 12, 2014
Flower Garden Update
I'm going to try and be good this year, and not spend too much $$ on new flowers! It is so tempting, especially when places like Lowes put their already-flowered plants on sale!
I planted a ton of new flowers last year (some I purchased, but most were from my mom and grandmother), so I think this year I just need to split and rearrange some things.
This big garden gets sun on the front edge but shade in the middle. My lamb's ear died here, but the short sedum (front center) is doing great. I might either split that, or transplant some of the short purple stuff from another garden. There's a nice hosta in the center, and 2 huge sedums in the back. I think I need to do something with the tall sedums, probably remove one and split it. I still want a few more tall shade plants for the center, not sure what to put here.

Next is my favorite garden, but a hard one to plant (it gets very little sun). The lamb's ear died here too, but the short sedum and purple stuff are both doing great. I think I will split them and spread them out to fill the front edge. The tall sedum (front left) needs to be moved, it is too tall. There are daffodils here, daisies, day lilies, and tons of hostas.

This is more of the same garden. I'm thinking the huge tall sedum in the back center needs to be moved too, but I'm not sure where. I also need to fill in the patch in the center (right behind the short sedum).

This is a cute little garden that I think just needs time to fill out. It is almost complete shade. It has 3 hostas, sedum, chives, and columbine.

This is my "project" garden for the year. I started it last year but expanded it this year. Plus all 3 of the plants I put here last year died! Now I have a clematis in the center, bee balm on the right, day lilies in the back, and some gladiolas. I think the bee balm needs to move to a more sunny spot (not easy to find around here!). The gladiolas are being devoured by something, so they need to go too. And I need short stuff along the front, maybe some sedum.

And last but not least, another part sun/part shade garden. This one has lots of day lilies, which is fine with me! The spot in the center of this picture needs more stuff to fill in.

The area right next to the tree could use some tall stuff too. There were a bunch of weeds which I finally pulled out this spring.

Thursday, July 10, 2014
NY State Fair, Here We Come!!
The show season is finally getting closer...I just filled out the entry forms for the NY State Fair!
The NY State Fair is held in Syracuse (about 1.5 hours from us) August 20-23 (the llama show at least).
I always feel funny going to shows when I have such a small herd, as I tend to bring more than half of my animals! This year, T, Kara, and Ralph are all going to be in my show string. I really didn't plan on showing T, but he is so close to his ALSA Halter Champion, and is showing a lot of promise in performance, so he gets to go too. Plus I figure if I'm taking 2, it isn't that much work (or money) to take 3!
So for this first show, T will be my showmanship buddy, in addition to showing in halter (non-breeder adult) and all 3 novice performance classes (obstacle, public relations, and pack). As an adult, he has to carry weight (25 lbs) in pack! That should be interesting, I should start training him for that soon!
As usual, Ralph is also just doing novice performance. He has to show against all the llamas, but that's okay since he can definitely hold his own! Unfortunately the state fair doesn't have alpaca halter classes, and he can't show with the llamas in theirs.
And last but not least, Kara. I debated about showing her in adult showmanship, as she is currently better looking than T, but she is a lot harder to get squared up. So she'll just be in halter (medium wool 2-yr-old female) and bred and owned female, in addition to the 3 novice performance classes. She probably doesn't stand a chance in performance, but I want to see how she does in the ring.
Overall it should be a great show, I'm so excited!!
The NY State Fair is held in Syracuse (about 1.5 hours from us) August 20-23 (the llama show at least).
I always feel funny going to shows when I have such a small herd, as I tend to bring more than half of my animals! This year, T, Kara, and Ralph are all going to be in my show string. I really didn't plan on showing T, but he is so close to his ALSA Halter Champion, and is showing a lot of promise in performance, so he gets to go too. Plus I figure if I'm taking 2, it isn't that much work (or money) to take 3!
 |
| Ralph and Kara at the 2012 Hoosier Llama Show. |
So for this first show, T will be my showmanship buddy, in addition to showing in halter (non-breeder adult) and all 3 novice performance classes (obstacle, public relations, and pack). As an adult, he has to carry weight (25 lbs) in pack! That should be interesting, I should start training him for that soon!
 |
| T in halter at the 2012 Hoosier Llama Show. |
As usual, Ralph is also just doing novice performance. He has to show against all the llamas, but that's okay since he can definitely hold his own! Unfortunately the state fair doesn't have alpaca halter classes, and he can't show with the llamas in theirs.
 |
| Ralph in novice pack at the 2012 Hoosier Llama Show. |
And last but not least, Kara. I debated about showing her in adult showmanship, as she is currently better looking than T, but she is a lot harder to get squared up. So she'll just be in halter (medium wool 2-yr-old female) and bred and owned female, in addition to the 3 novice performance classes. She probably doesn't stand a chance in performance, but I want to see how she does in the ring.
 |
| Kara in halter at the 2012 North American International Livestock Expo. |
Overall it should be a great show, I'm so excited!!
Wednesday, July 9, 2014
Corespinning Llama Fiber
Well I have no excuse, I plumb forgot about posting yesterday!
And honestly I had no idea what to write about, even today, but luckily I found some cool pictures on my camera and thought I would share!
A few weeks before the CNY Fiber Fest back in June, I set out to corespin some of the baby llama fiber I bought from a friend. I had washed 2 baby llama fleeces back in May, but hadn't done anything with them yet.
The dark brown fleece I tried just lockspinning (without a core). It turned out pretty cool, but I wanted the added strength of a core.
So for the white/brown fleece, I decided to corespin it!
First up is to pre-spin the core. This is actually optional, and honestly I'm not sure it did me any good.
The nice thing about corespun yarn is that it has less twist than a typical single, so it tends to be a lot softer.
And honestly I had no idea what to write about, even today, but luckily I found some cool pictures on my camera and thought I would share!
A few weeks before the CNY Fiber Fest back in June, I set out to corespin some of the baby llama fiber I bought from a friend. I had washed 2 baby llama fleeces back in May, but hadn't done anything with them yet.
The dark brown fleece I tried just lockspinning (without a core). It turned out pretty cool, but I wanted the added strength of a core.
So for the white/brown fleece, I decided to corespin it!
First up is to pre-spin the core. This is actually optional, and honestly I'm not sure it did me any good.
 |
| My starting "ingredients" |
Next you attach your spinning fiber and spin it with the core (however it happens to twist together) for a few feet to fully attach the fiber to the core.
Finally you start to get the fiber to cover the core. For me, it works best to hold the fiber at an angle to the core (some say 90 degrees, but mine is more 50-60 degrees). I sort of cheat, and try to use a core that is a similar color to the fiber so that it isn't terribly obvious if the core peeks out here and there.
There is a lot of trial and error in corespinning...figuring out the right angle, how much fiber to draft, etc. But it is fun to play with!
 |
| Corespinning! |
 |
| Corespun yarn on the bobbin. |
The nice thing about corespun yarn is that it has less twist than a typical single, so it tends to be a lot softer.
 |
| Finished yarn! |
Subscribe to:
Posts (Atom)