Friday, October 25, 2013

Rhinebeck (aka NY Sheep & Wool Festival) 2013!

I had a pretty busy weekend last week...spent most of the day Saturday spinning at the Hamilton Farmer's market (unfortunately didn't sell a whole lot), and then spent ALL day Sunday at Rhinebeck (aka the NY Sheep and Wool Festival)!

I've always wanted to take a spinning class at a fiber festival, and I figured Rhinebeck was the place to do it!  I found 2 spinning classes that looked interesting, and ended up signing up for the one about spinning different thicknesses in yarn (I think it was called "Spin it Thick, Spin it Thin").  The class started at 9am, and Rhinebeck is almost 3 hours from Norwich, so it was quite the early morning.  The class was very interesting, but I didn't get as much out of it as I was hoping.  (I'm hoping that means I know more about spinning than I originally thought!)  It was still a great experience though.

After the spinning class, I went to check out my competition entries.  About a month ago, I sent 4 items to be judged: a felted bag with flowers, a handspun Polwarth skein, a handspun alpaca/silk skein, and a handknit cowl.  As it turns out, I can't read directions and the festival management can't write directions!  I had the cowl disqualified because I used yarn with bamboo, which apparently isn't a "natural" fiber.  I also had the alpaca/silk skein disqualified because I forgot to write the fiber content on the information card, even though the directions didn't say to do so!  I was bummed, but my other 2 items placed well so I can't be too upset.  My Polwarth skein got 3rd in the 2-ply natural wool class, and the felted bag got 2nd in the felted class!

My Polwarth skein is the white one in the middle with a ribbon!

My felted bag!

Another picture with better lighting.

And of course the most important part of the day was shopping!  I had 2 Christmas presents to shop for (one was yarn for a cowl, the other can't be mentioned), and found exactly what I was looking for.  I also splurged and bought some roving for myself...8oz of dyed Cormo pencil roving, 1 pound of natural Cormo roving, and 4oz of dyed silk!  I have no idea what I'm going to do with any of it, but it was too gorgeous to pass up!  I'm actually thinking about knitting something for myself out of the dyed Cormo!  (Shame on me for not taking pictures of my loot!)

Rhinebeck is also great because of all the entertainment they have!  They once again had frisbee and flyball demos from a dog rescue group, as well as sheep herding!

Frisbee!

Border collie herding sheep.

She was really good!

Gotta love the border collie crouch!

I miss flyball so much!

It was a long weekend, but all in all a great one!  I have one more long day tomorrow (another farmer's market day in Hamilton), but I'm going to sleep in on Sunday!


Friday, October 11, 2013

Almost Done (Unpacking)!

I promise that I will eventually get the hang of posting here on a regular basis!  But in my defense, things have been quite busy around the farm for the past few weeks.  First was a week-long trip back to Indiana to pick up the llama trailer and (most of) the llama stuff, and since then I've been busy unpacking!

The most important thing to unpack was the stall panels!  The llamas have quickly eaten most of the grass in their pasture, so I wanted to set up the stall panels in some taller grass outside the pasture and let them graze in the afternoons.  I've let them in the pen for the past 4 days, and they seem to love it!  Hopefully it will help the pasture recover too.

The herd enjoying a beautiful fall day.

Also very important to unpack were the hay feeders.  I decided to stick the outside hay feeder in the grass just outside the barn...that way I don't have to shovel too much snow this winter!  We have to do a bit more rearranging before we can put the indoor hay feeder in place in the barn, so for now the llamas are still eating hay out of big buckets.

Hay feeder in place!

The biggest chore though was to unpack all of the little supplies and put them in my newly-cleaned storage room!  I spent several days before our trip cleaning out the dirt and sand in this little room, and cleaning the cabinet so I could paint it.

Feed bins, medical supplies, and heated water buckets in the storage room.

I primed and painted the cabinet this week, and it perfectly dry today and ready to be filled!

My beautiful painted cabinet, as well as a bunch of llama supplies.

I even got to "steal" this nice little vanity cabinet (from my parents' house) to store halters in!  It was installed today, but I still need to screw in the hooks.

Halter cabinet ready for use!

Now for some of the other random things I did today...  First was to fix the gate latch!  I had locked all the animals in the barn this afternoon so I could halter them one by one and collect fecal samples to process tomorrow.  I stepped out of the barn to re-arrange their stall panel pen in the yard and came back to the gate wide open and a broken latch board!  No idea what happened, but luckily it was easily fixed.

Somehow the board got broken right in half!

New board in place with the latch.  This one will be a lot harder to break!

The best thing that happened today...I figured out how to turn the lights on in the barn!  There are a million switches and plugs in this old barn, and somehow I had overlooked the one that turns on the lights!  I'm so glad I will have lights this winter, even if I have to walk half-way into the barn to turn them on!

We have light!!!

And last but not least, my "fecal station" countertops!  I've decided to use an old laundry sink to run fecals, but there isn't any table/counter space to set the centrifuge.  So I bought some plywood at Lowes last week and plan to set the pieces on top of the sink to create a temporary counter top.  They can also be removed when I need to use the sink to wash things after running fecals!  I wanted something that was fairly water-proof and easy to clean, so I primed and painted the plywood pieces (just like the cabinet), and then applied 3 coats of polyurethane.  Hopefully they will be dry tomorrow so I can run fecals!

Painted "countertops" ready for the spray coat.

So that was my day today...and the past few days have looked about the same!  Now that the trailer is unpacked I hope to go get another load of hay next week.  We also have to unload all the rubber mats from the back of the truck (as well as some of the obstacles), and get those in place in the barn!  It will be so nice to have everything done!

Sunday, September 22, 2013

Llama Biography #11: Autumn Hill's Tatoka

Things have been pretty quiet around the farm, and I keep forgetting to take pictures of things, so I'm going to be lazy and do another biography post.

Llama #11 on our farm was Autumn Hill's Tatoka.  In spring 2001, we took 2 of our breeding females (April and Sheba) to Yellow Wood Llamas in Martinsville, IN to be bred to 2 of their males.  April was to be bred to PPF Pablo Cruz, a beautiful white male with a red head.  She was bred and spit off several times before returning home with Sheba.  Later in the fall we determined that April didn't hold the pregnancy, so she went back to YWL to be bred again.  She was bred again, and during one of the spit tests she actually attacked Pablo!  We hoped she would hold the pregnancy and took her home again.  About a year later (in October 2002), Tatoka was born.

Autumn Hill's Tatoka at 1 month of age.  (Unfortunately this is the only digital picture I have of him!)

April was notorious for having her babies when no one was home.  On the day Tatoka was born, my mom came home to check on April during her lunch hour.  Barely an hour later, my sister and I came home on the school bus to find the baby already born and walking around!  Tatoka is a Native American word for "antelope" (I believe in the Lakota language).  Tatoka was running around the pasture almost as soon as he could stand on 4 legs, so we thought the name was appropriate.

Alder Crest April Showers, Tatoka's mom, at the 2002 Great Lakes Regionals.  Tatoka was only 2 weeks old at the time of this show, and he was a huge hit!

Tatoka was one of the very first llamas that I sold.  He was sold to a new llama breeder and fiber artist in February 2003 (though he didn't leave the farm until he was weaned).  His new owner has since become a great friend, and she gives Tatoka a great home.  Tatoka was purchased to be a breeding male, but he was ultimately gelded and is now a farm greeter and fiber producer.  Every time I go to visit (his owner also has a fiber store!), it amazes me how much he looks like his mom!


Tuesday, September 10, 2013

Off Topic...Flowers!

I'll apologize in advance...this post is quite off topic!  But I'm (hopefully) bringing a bunch of flowers back from home (Indiana) when I got back in two weeks, and I need to figure out what to do with them!  I promise to talk about fibery/llama things in the next post!  But feel free to share your opinion on what I should do with the gardens!

Garden #1: Back Tree

This is a newer garden.  It is under a big tree, but it mostly gets sun.  There were some day lilies, to which I added lavender, purple coneflower, a low purple plant, lambs' ear, and lots of sedum.  The lavender is slowly growing, the coneflower got eaten, but the rest are doing great.  I'm definitely moving the coneflower and would like to replace it with another tall plant (maybe a daisy).  There is also lots of room to add flowers to this garden.

Early spring.

Mid-summer, before the coneflower got eaten!

Poor dead coneflower, but the sedum went nuts!

Back side of the same garden.
Garden #2: Swing Set

This is a brand-new garden.  I needed a sunny place for a clematis (at least we HOPE it is a clematis!), so I dug out a spot under the swing set that is used as a bird feeder hanger in winter.  I'd love to get vines growing all over the swing set!  In addition to the clematis, there are three other plants I bought on sale at Lowe's this summer.  The rabbits were munching on one, but some well-placed dog fur was a great deterrent!  For now I think I'm leaving this garden alone; it doesn't need to get too big, and I'd like to see how the plants fill out.

Right after I planted.

Clematis finally started growing!

Garden #3: Aspen

This is my "oops" garden!  All winter as I was watching the sun exposure in the gardens, this spot was sunny!  But once the huge maple tree a few feet away leafed out in the spring, it was almost 100% shaded!  I planted a lot of sun plants here, and now they all need to be moved.  Currently there is sedum (which is doing okay), columbine (also okay), daisies, grape hyacinths, and two types of lilies.  I also replaced a couple of other plants with two hostas, which will definitely stay.  So I need to replace most of the plants in this one...

Early spring.

Mid-summer.

After adding the hostas.  The sedum looks great.
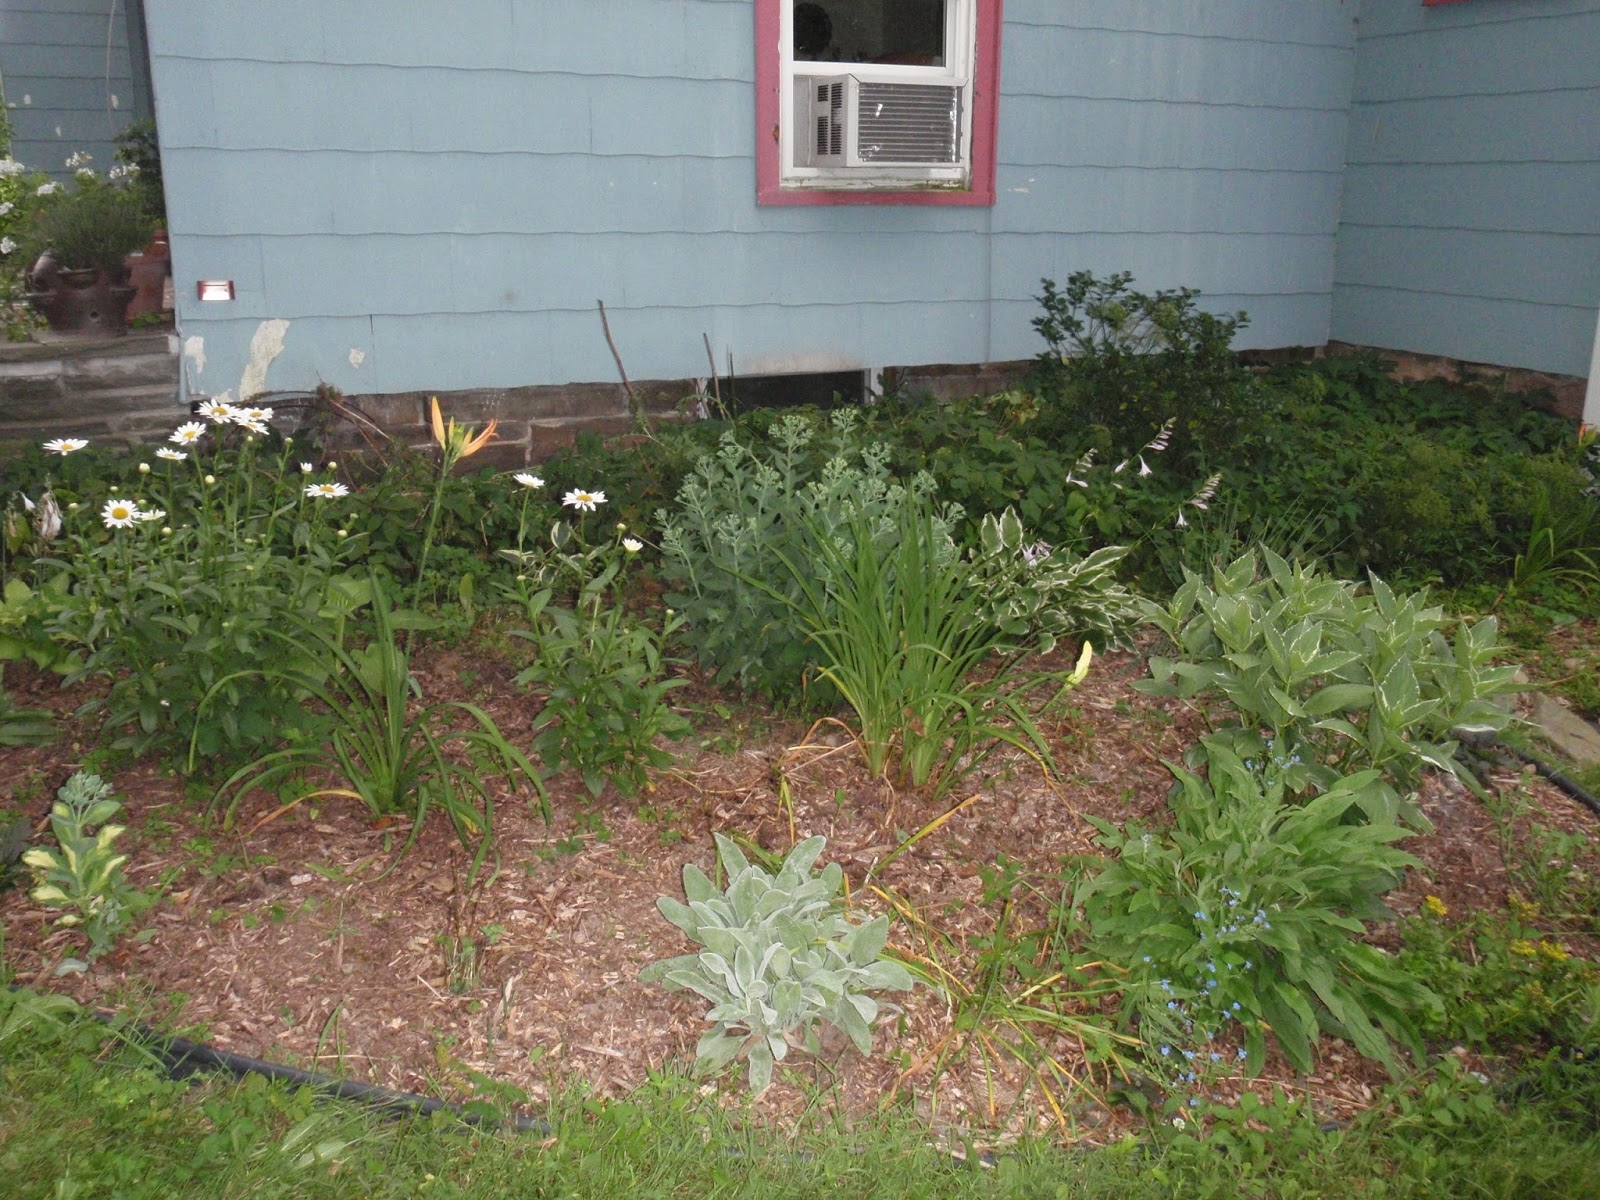
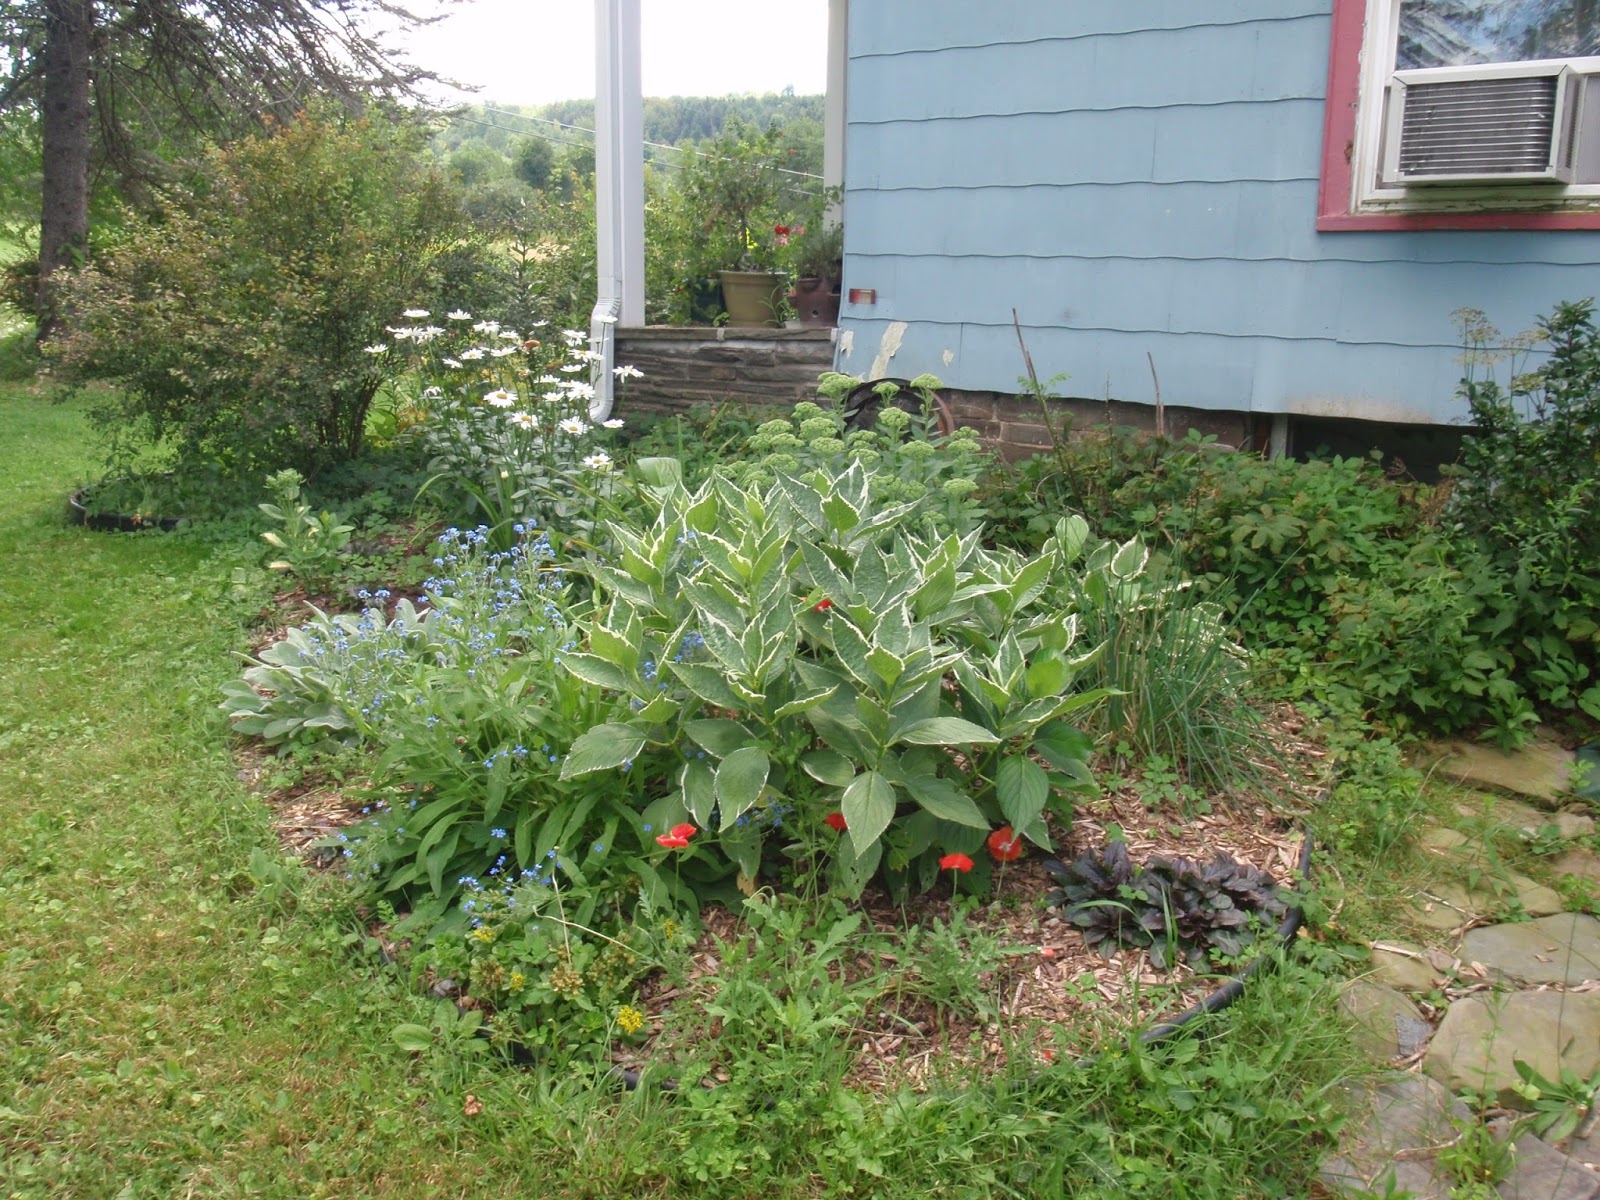
Garden #4: House

This was an existing garden, but it has still taken a lot of work.  And it is huge!  It is on the north side of the house, so I believe it gets morning light and afternoon shade.  The outside edges of the garden obviously get more sun than the inside.  There were a few hostas and lilies here, as well as some sort of shrub.  I have planted more hostas, a forget-me-not, chives, more of the low purple flower, lambs' ear, daisies, sedum, poppy, lily of the valley, and some other shade plant I can't remember the name of.  The poppy sort-of got eaten (though the dog hair remedy worked here as well!), but most of the rest are doing good.  Some of the hostas have been slow to grow, but hopefully they'll take off next year.  I don't think anything needs to move out of this garden, but there is room for some shade plants if I have them leftover.

Early spring.

Early spring (left side).

Mid-summer.

Late summer.  Really starting to fill out!

The bush thing is starting to take over, but apparently it dies off every winter.

The back part (close to the house), which could use more shade plants.

Garden #5: Pine

This is another new garden.  It may have been started last year...  Another partial sun/shade.  There is a nice big bunch of irises, some lilies, and lots of roses.  I added lots of sedum, some columbine, a lemon balm plant, lambs' ear, and a hosta.  All seem to be doing well, but there is lots of available room for new plants.

Early spring.

Late spring.  There is more room on the far left for plants.

And just for kicks, the established gardens.

Lone garden in the middle of the lawn.

The hedgerow garden really needed to be weeded!

The coneflowers didn't get eaten here!
So...thoughts?  Tips?  I'd love to hear what you think!

Thursday, September 5, 2013

Pasture Management

Slowly but surely, I'm working on rehabilitating the pasture.  I should've done more of the work BEFORE the llamas got here, but hindsight is always 20-20.  And as it turns out, the llamas are pretty good at pasture management too!

The llamas enjoying the bottom part of the pasture.
As I've mentioned before, I did quite a bit of mowing (with the push mower I might add!) before the llamas got here.  Most of the pasture is too tight or hilly to mow with the bush-hog, and the riding lawn mower is worthless!  So I push mowed and raked about 75% of the pasture, hoping to get rid of some of the weeds and encourage the grass to grow.

For the most part, the mowing worked great.  The tall burdock plants are gone (although there are new ones growing in their place!), and the grass is growing back in.  I couldn't mow everywhere though, as there are two large spots in the pasture that are covered in small boulders/large rocks, and I didn't want to break the mower!  So the weeds in those spots were at least chest high, if not higher.  Luckily the llamas seem to LOVE these weeds, and they are slowly taking care of them!  T prefers to wade through the weeds to find the ones he likes, while Kara buries her head!  It is quite funny to watch.

The llamas are slowly working their way through the tall weeds.
Another big aspect of the pasture rehabilitation is filling in holes and gaps in the fence.  In the past two days we've moved about 4 loads of dirt, using it to fill in some ground hog holes and one big gap in the fence.  I could use another 10 or so loads, but we'll get there eventually...

One of the gaps in the fence we are trying to fill.  There is also probably some barb-wire fence buried underneath too.
I've also been planting a TON of grass seed!  Since the pasture was about 50% covered in burdock plants, there are now a lot of bare spots (where the burdock was shading out the grass).  I fenced off the biggest bare spot (in the bottom part of the pasture), and in the few short weeks since the weeds were cut there has been a lot of new grass growing.  It is already about 6" tall!  Unfortunately there is still a big bare spot right along the fenceline, so I roughed it up with a rake and spread grass seed.  Of course we then got about 2" of rain, so I re-planted about half of what I had done!  This time I covered the seed with a light layer of hay, to protect from driving rain and birds.  Hopefully we will get some rain in the next few weeks so the seeds can start to grow!

The big bare spot in the bottom part of the pasture, now seeded and covered with hay.
Another big area up by the barn was also covered in burdock, and now that those are gone I planted seed there as well.  That spot is close enough to the barn that I can water it on a regular basis, so I expect it to start growing sooner than the other spots.  Unfortunately I didn't have enough temporary fence posts to block this spot off as well, so I hope that the llamas don't trample the new seedlings or eat them too early!

Another bare spot in the pasture, also re-seeded.  This one is up at the top, by the silos and barn.
 And last but not least, I've been doing weed management.  As I mentioned above, even though the big burdock stems had been cut down, there were still new plants growing in.  And the tiny burdocks were producing seeds already!  (The llamas are COVERED in burrs, if you were wondering...)  I tried twice to spray the burdock plants with a safe herbicide mixture (vinegar, salt, and dish soap), with varying results.  I decided that it wasn't working well enough, so I spent two afternoons digging/pulling the larger burdock plants by hand.  Technically it worked (the plants are gone after all!), but there are still a lot of tiny burdock plants, so today I decided to mow about half of the pasture.  I'm planning to mow it every 2-3 weeks, and hopefully the grass can out-compete the weeds and take over!  There are also two low-growing weeds in the same area of the pasture, and hopefully the grass will out-compete those as well.

One side of the pasture which is covered in weeds.

Two of the weeds in that spot of the pasture.
I'll try to remember to report back in a few weeks and give an update on how the pasture is doing.  Unfortunately there isn't much time left in the growing season, so I expect (and hope!) that the real difference will be seen next spring.

Mr. T getting caught in the temporary fence.

Wednesday, August 21, 2013

Short Update and Opinions Needed

Well, I've calmed down...  The dog fiasco has become less of a worry, and the llamas are settling in nicely.  They've finally explored the entire pasture, and are working on picking up every burr out there!

Bluff also left for her new home today.  It was a bittersweet moment...I'll definitely miss her, but she's going to a FABULOUS home and I couldn't be happier!  I can't wait to see what she gets to do with her new family!

A much fuzzier Bluff...this picture is about 5 years old!

And now for the opinions I need!  I've finally started my first Rhinebeck project!  I'm making a felted bag, which gets flowers and leaves sewn onto the front (they aren't felted).  I bought yarn from Knit Picks, but ended up not getting enough of the main color for the bag, so I "borrowed" some from my mother-in-law.  I love how the bag looks now (it is a lot more colorful), but my original yarn for the flowers now doesn't work!  So I need something new.  I searched through the yarn stash again today, looking for options...  I need to knit flowers AND a vine with leaves, so the pictures show two colors (green and something else) that I would use.

#1 (blue).  Probably my favorite option.

#2 (white), and #3 (yellow).

#4 (dark pink).

#5 (light pink).

#6 (light blue/grey).
So...which color do you think I should use?  Technically I could use two colors, if you think more color on the bag would look better!  I appreciate the help!